Its free!
Its opensource!
Its makes development faster!
Its amazing!
Faster development of web application with an ease.
AJAX based app develop in java and run in all browser.
Works well with Android/iPhone.

Google has done preaching on their site and blog about GWT, find more details their.
Ofcourse believers of those preaching also wrote a lot about it on their blog(s), website(s), papers, etc,
So, moving to example.:
Pre-requisetes
Eclipse, Java.
Download and install GWT plugin for eclipse, in my case its for indigo and link is as follows:
http://dl.google.com/eclipse/plugin/3.7
for complete instruction use the following link
https://developers.google.com/eclipse/docs/install-eclipse-3.7
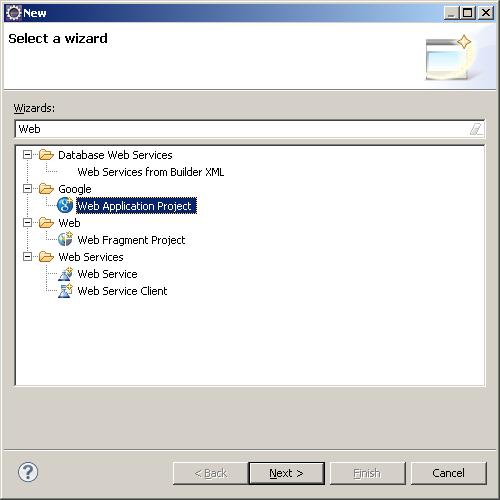
Create a Google Web Project -> GwtWebAppDemo

Click on next.

Un-check the checkbox "Use Google App Engine" as we are going to use internal app server.
Click on finish.
A new google web project is created with default project files.
Delete all default java files from client, server and shared package.
Add a new Entry-Point class into the client package.

One entry will be added into GwtWebAppDemo.gwt.xml.
Verify that entry point is correct in GwtWebAppDemo.gwt.xml. In this case its
Change the class in entry-point tag if you have changed/added the class manually and not as Entry Point Class.
Add RootPanel to the entry point class i.e. GwtDemoAppClient.java in onModuleLoad() method.
RootPanle is a panel to which all other widgets must ultimately be added.
RootPanels are never created directly. Rather, they are accessed via get().
Most applications will add widgets to the default root panel in their EntryPoint.onModuleLoad() methods.
After that right client on GwtDemoAppClient.java and open with GWT Designer
We are ready for adding the components by drag and drop.

I have selected LayoutPanel as it allows its children to be positioned using arbitrary constraints.

Add few componets to the layoutPanel and test the demo without web app to see it as preview.

If its fine than go ahead and create a web app/deploy to internal app server which is jetty.
Else go and add/remove/update components in the panel.
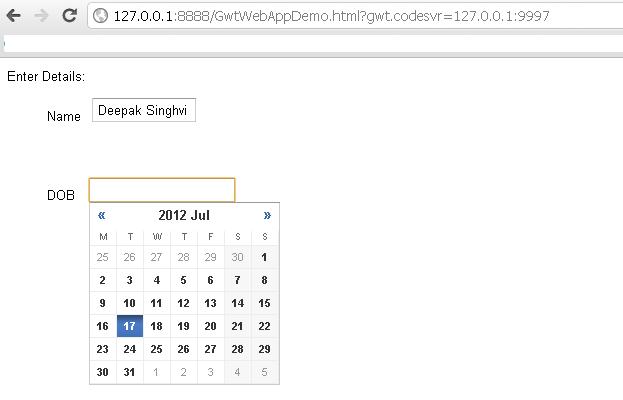
Change the default html content of GwtWebAppDemo.html in the war/WEB-INF folder.
Right click on the project and click on Run As Web Application
It will start new tab as development mode, copy the link and paste into your browser


Its opensource!
Its makes development faster!
Its amazing!
Faster development of web application with an ease.
AJAX based app develop in java and run in all browser.
Works well with Android/iPhone.
Google has done preaching on their site and blog about GWT, find more details their.
Ofcourse believers of those preaching also wrote a lot about it on their blog(s), website(s), papers, etc,
So, moving to example.:
Pre-requisetes
Eclipse, Java.
Download and install GWT plugin for eclipse, in my case its for indigo and link is as follows:
http://dl.google.com/eclipse/plugin/3.7
for complete instruction use the following link
https://developers.google.com/eclipse/docs/install-eclipse-3.7
Create a Google Web Project -> GwtWebAppDemo
Click on next.

Un-check the checkbox "Use Google App Engine" as we are going to use internal app server.
Click on finish.
A new google web project is created with default project files.
Delete all default java files from client, server and shared package.
Add a new Entry-Point class into the client package.

One entry will be added into GwtWebAppDemo.gwt.xml.
Verify that entry point is correct in GwtWebAppDemo.gwt.xml. In this case its
Change the class in entry-point tag if you have changed/added the class manually and not as Entry Point Class.
Add RootPanel to the entry point class i.e. GwtDemoAppClient.java in onModuleLoad() method.
RootPanel rootPanel = RootPanel.get();
RootPanle is a panel to which all other widgets must ultimately be added.
RootPanels are never created directly. Rather, they are accessed via get().
Most applications will add widgets to the default root panel in their EntryPoint.onModuleLoad() methods.
After that right client on GwtDemoAppClient.java and open with GWT Designer
We are ready for adding the components by drag and drop.

I have selected LayoutPanel as it allows its children to be positioned using arbitrary constraints.

After adding the components you can see the generated code:
Add few componets to the layoutPanel and test the demo without web app to see it as preview.

If its fine than go ahead and create a web app/deploy to internal app server which is jetty.
Else go and add/remove/update components in the panel.
Change the default html content of GwtWebAppDemo.html in the war/WEB-INF folder.
Right click on the project and click on Run As Web Application
It will start new tab as development mode, copy the link and paste into your browser

For the first time it will ask for installing the plugin for gwt.
Install it and see the application running.
Do remember to close the client running the the IDE before launching it again.
You can download sample from here --> GwtWebAppDemo.rar